Starting a new job
Setting up a job in the Trukton app only takes a few taps. Whether you’re tracking a single haul or multiple loads, adding a new job ensures you have all the right details in one place from the start.
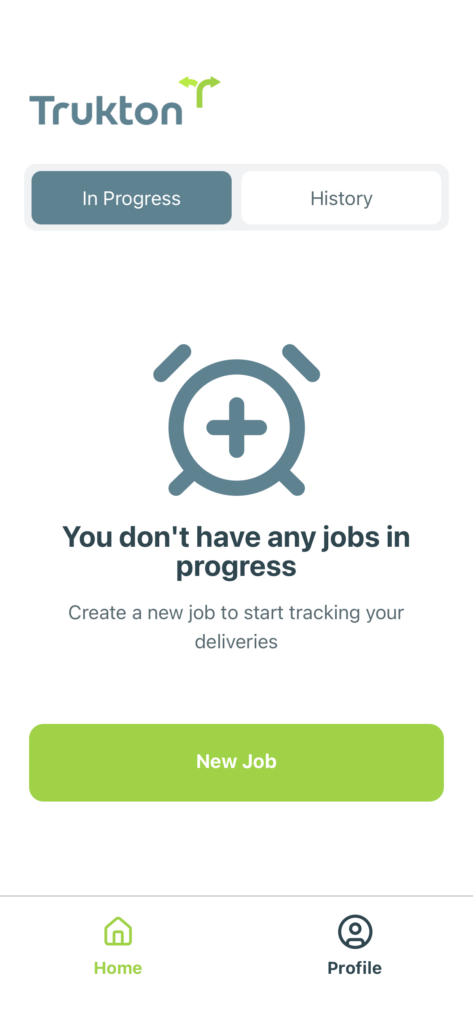
If there are no jobs currently in progress, you’ll see the option to create a new one. Tap the green New Job button to begin.
If you’ve already created jobs, use the Home screen to manage them and start additional ones when needed.
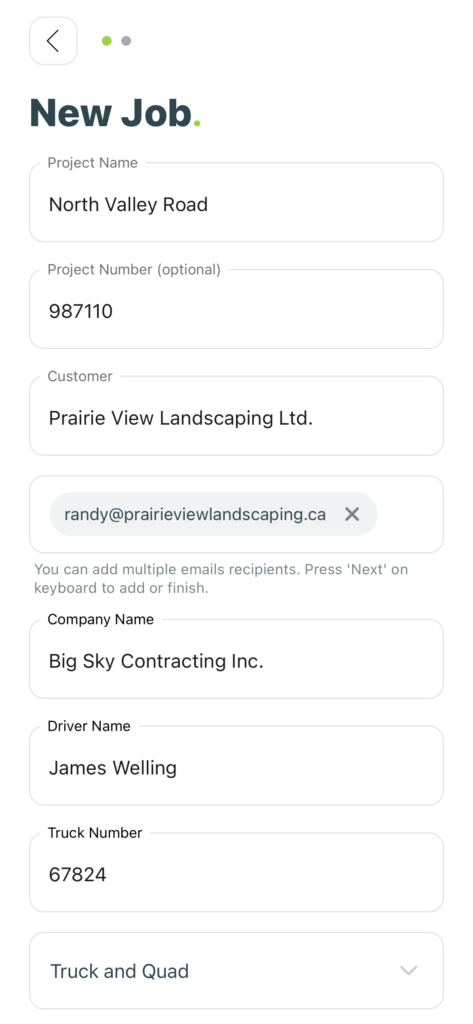
Add the project name, customer, and company information. If you have a project number, you can include it as well. Under “Customer,” enter at least one email address to send job tickets to the right contact.
To add more than one email, press the Next button on your device’s keyboard after each one. When all details are complete, tap Next at the bottom of the screen to move forward.
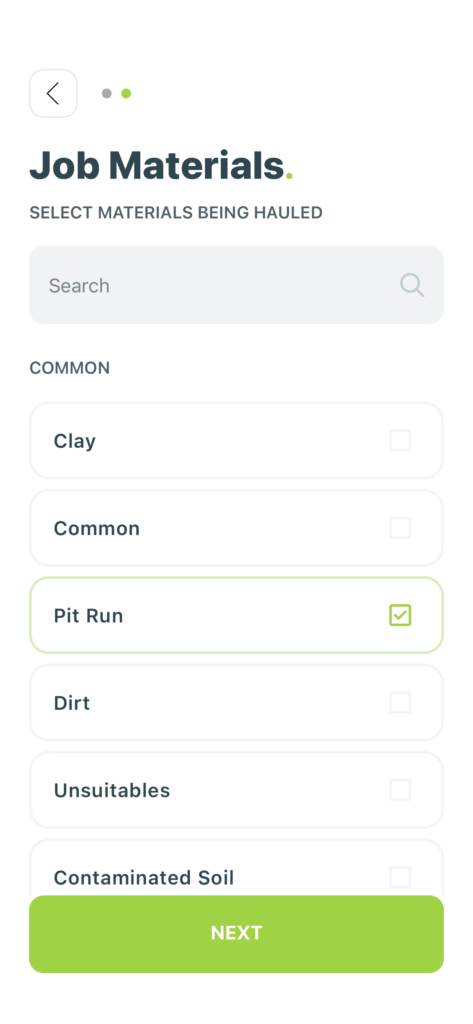
Choose the material or materials being hauled by tapping the checkbox next to each one. Once you’ve made your selections, tap Next to continue.
You can use the search bar to quickly find an existing material, or to add a new one if the material you’re hauling isn’t already listed. Just type the name and follow the steps to have it added to your materials list.
After selecting a material, tap it to open the location entry screen. Fill in the pickup (from) and drop-off (to) addresses, then tap Apply to save.
These locations can be updated later if necessary.

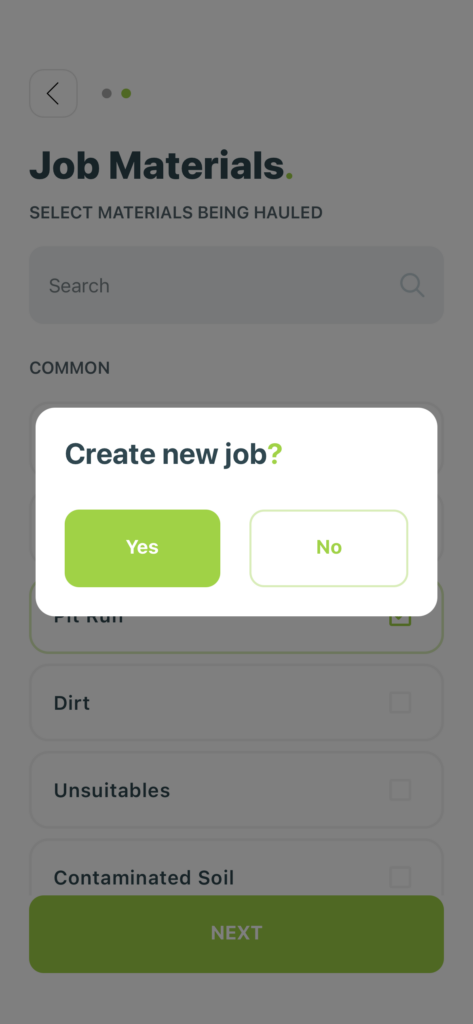
A confirmation screen will appear after all details have been added. Tap Yes to create the job or No if you want to go back and make edits.
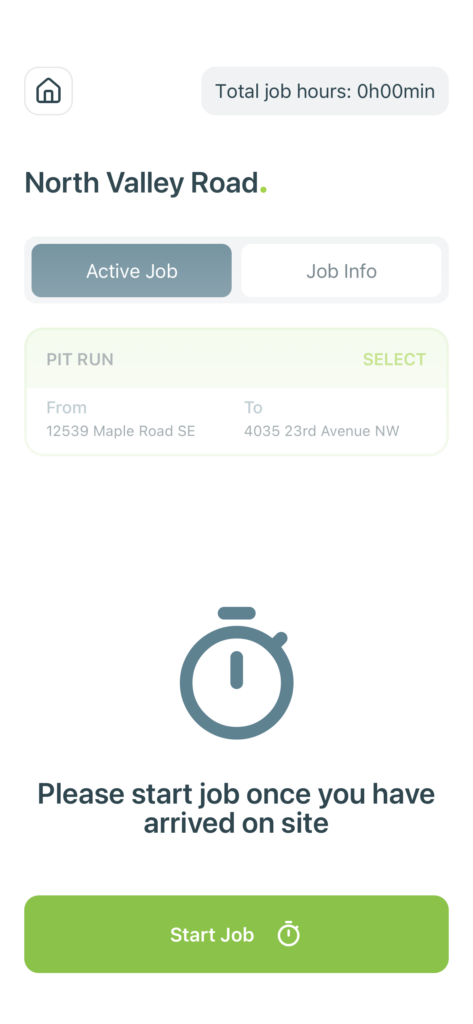
Once you’ve arrived at the job location, tap Start Job to begin tracking time. The timer will track total job hours from the moment you start.
Make sure you’re on site before starting the job to keep your logs accurate.
Was this helpful?